Get Access to Raspberry Pi without Screen
Raspberry Pi is a credit-card sized (not the thickness) Linux computer, besides its small size, it has pins (GPIO, I2C, etc) which allow you to connect other electrical devices, like motors, servo, sensors, LED, etc. I felt in love with Raspberry Pi (RPi) in summer of 2014: as an IT advisor, the childhood dream of making robot could come true! In this blog, I will show how to get access to RPi without screen.
To go through this tutorial, you need the following devices get ready:
- Raspberry Pi B+ (including micro SD card)
- Micro SD card reader
- DC Power with output 5V2A through micro USB cable
- Ethernet cable (RJ45 port)
- USB WiFi adapter (No driver needed)
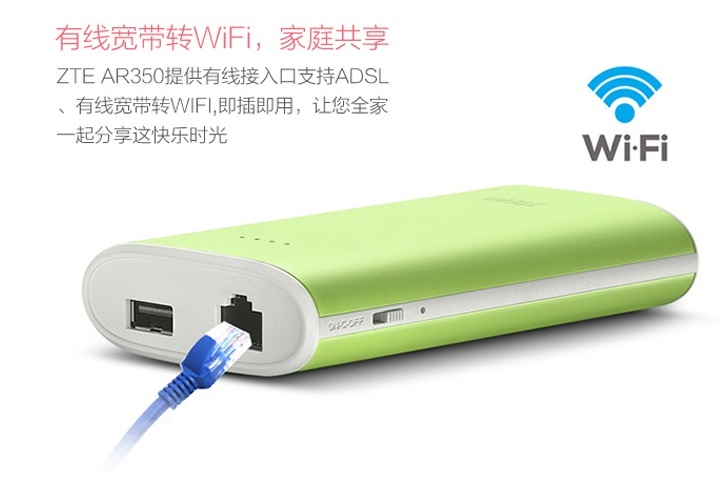
- WiFi router with RJ45 port
###1. Get access to RPi via an Ethernet cable
-
Download the zipped Raspbian image and unzip it. The unzipped image’s size is about 3GB.
-
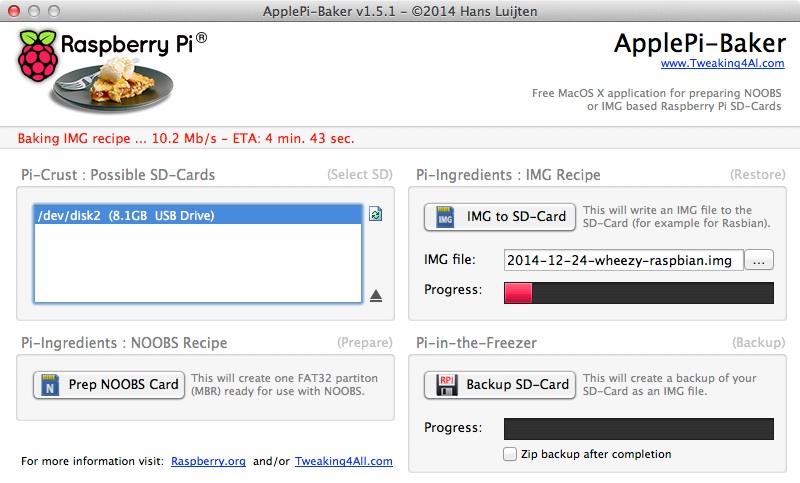
Burn the unzipped image into the micro SD card of Raspberry Pi. Following the official instruction to burn image to your SD card. If you use Mac OS, I suggest you to download an app called ApplePi-Baker and install it. ApplePi-Baker is designed for RPi specially. First, insert your SD card to its reader, and connect the reader to your computer. Open ApplePi-Baker app, choose the micro SD card and select the unzipped Raspbian image, then click install. The installation could take up to 5-10 minutes depending on the writing speed of your micro SD card.
-
Keep the SD card reader connected with your computer, and open it. You will find a file called cmdline.txt under root directory, open it and add ip=192.168.10.100 at the end of the first line, then save it. The IP address should under the same subset (netmask) as your computer. If the local IP address of your computer is 192.168.0.153, then you may give an IP address like 192.168.0.154, just make sure there is no other equipment had taken this IP already. You can use ipconfig (Win) or ifconfig (Mac/Linux) to check your local IP address. The setting of cmdline.txt lets your RPi have a default IP which under the same subset as your computer, so your computer can visit it via Ethernet cable directly.
-
Remove the micro SD card from its reader and insert it to your RPi. Connect the RPi and your computer using an Ethernet cable (RJ45), then start the RPi.
-
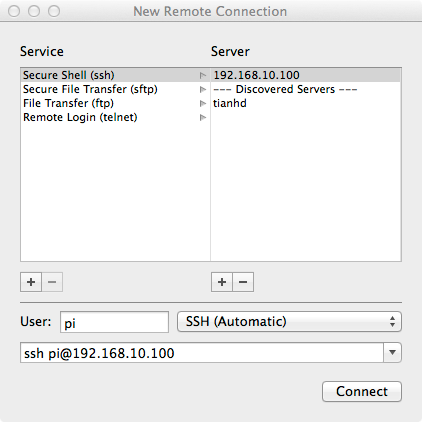
Now open a SSH software to get access to RPi. If you are using Mac OS, you can use Terminal -> Shell -> New Remote Connection -> Secure Shell (ssh) which come with the system, if you are using Windows, you can use putty. Before we start to access to RPi, we need to turn off the WiFi of our computer, because the RPi is now connected with our computer through Ethernet cable, not WiFi. Once connected with RPi, we can turn the WiFi of your computer on, so you can both control RPi and browse internet. Note, you may need to wait a little while.
One shortcoming of this method is: your RPi has no connection with internet!
###2. Let your RPi visit internet through WiFi
I highly recommend you to get a USB WiFi adapter ready for your RPi, it’s really neccessary and convenient. However, not all USB WiFi adapters are suitable, we need a No Driver Needed WiFi USB adapter (listed on above).
- First, let’s check which devices were connected with RPi before we inserting the WiFi USB adapter.
lsusb- Then, insert the USB WiFi adapter into a USB port, and check the USB devices again (RPi may need several seconds to recognize it).

The new line indicates the USB WiFi adapter has been recognized by RPi.
- Now let’s check the connection of the USB WiFi adapter.
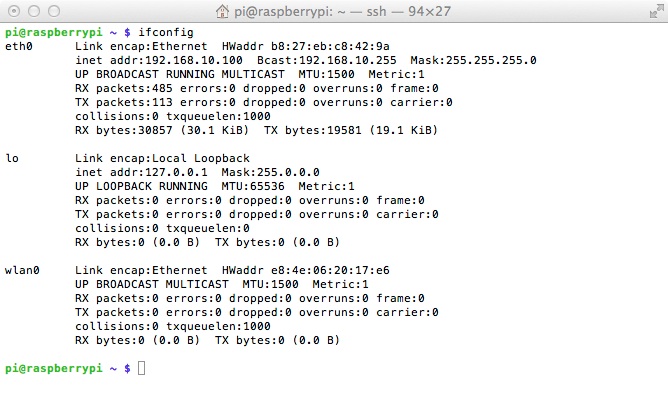
ifconfigWe can see that RPi has a wlan0 device, but without IP address, that’s because the WiFi adapter hasn’t connected to your WiFi router.
- Scan available WiFi signals.
sudo iwlist wlan0 scan | grep "ESSID"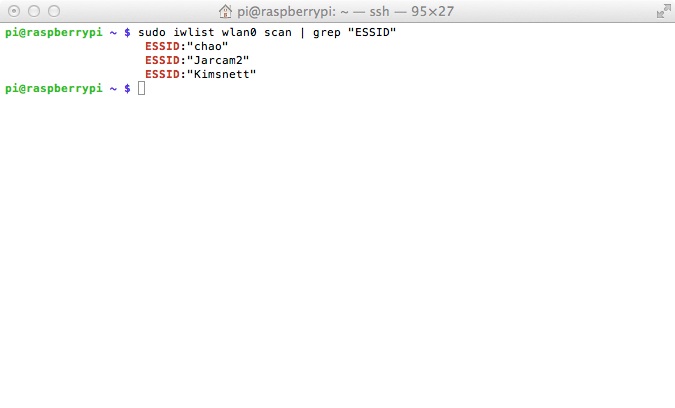
If you can see your WiFi in the list, then move to next step to set the WiFi connection.
sudo nano /etc/network/interfacesModify the context as the following:
auto lo
iface lo inet loopback

auto wlan0
allow-hotplug wlan0
iface wlan0 inet dhcp
wpa-ssid "WiFi name"
wpa-psk "password"
where the “WiFi name” is the name of your WiFi, and “password” is the password to your WiFi.
Then, run the following command to re-config RPi’s network connection:
sudo /etc/init.d/networking restartnow use ifconfig to check if device wlan0 now has IP address, if yes, then your RPi has connected to internet already. Restart RPi, and then you can use ping to test web connection, like:
ping www.google.com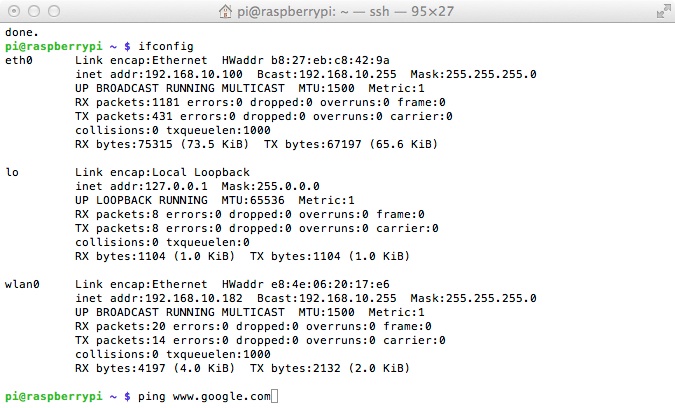
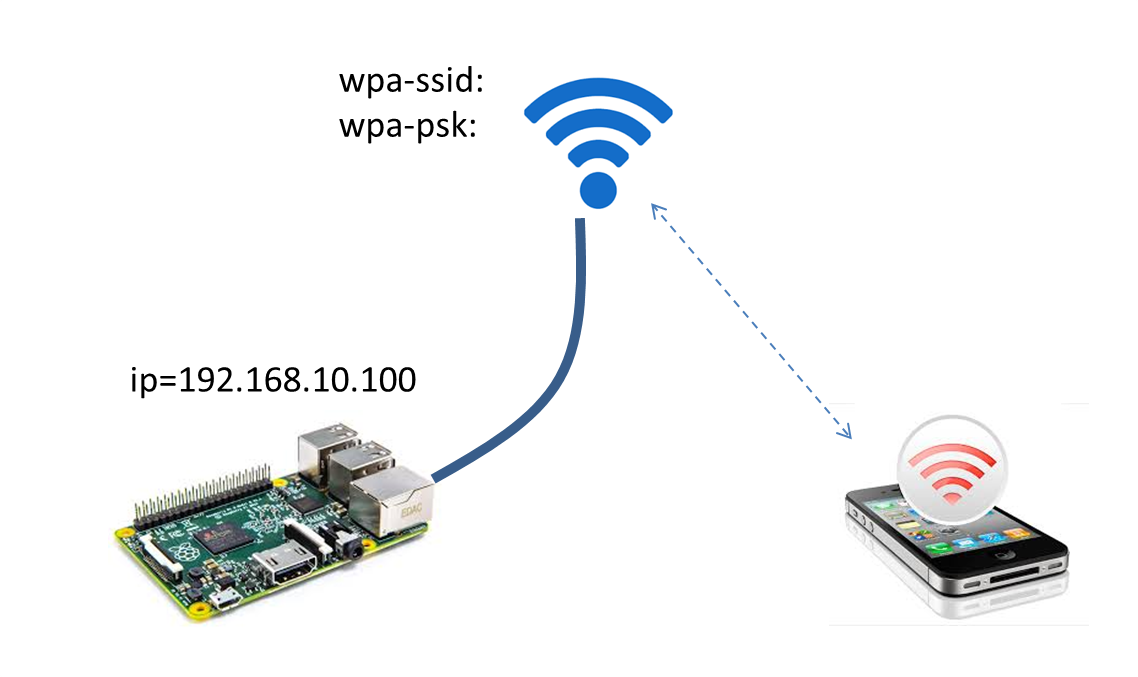
Now, we can access the RPi via Ethernet cable and let RPi visit internet through USB WiFi adapter. Note, we can only access RPi via Ethernet cable because we added ip=192.168.10.100 to cmdline.txt in the boot directory of RPi. Every time the RPi start, it sets its IP address as 192.168.10.100.
This method also apply to a mobile hotspot, what you need to modify is just the wpa-ssid and wpa-psk to your hotspot’s name and password.
###3. Access RPi via WiFi or Ethernet cable.
Until now, we can access RPi through Ethernet cable only! If we want to access RPi through WiFi, we can delete the ip=192.168.10.100 in cmdline.txt, and reboot RPi without Ethernet cable connected.
sudo nano /boot/cmdline.txtAfter RPi starts, the WiFi adapter will take a little while to work (blink), then we can access RPi through WiFi. We can also access RPi from our smart phone (WiFi should be opened and connected to the same WiFi router as RPi) use SSH app, like juiceSSH.
Due to the IP address in cmdline.txt has been deleted, we can’t access RPi through Ethernet cable directly any more. To enable the access via Ethernet cable, we just need to add the following lines to /etc/network/interfaces:
iface eth0 inet static
address 192.168.10.100
netmask 255.255.255.0
gatewat 192.168.10.1
Now, connect RPi and computer with Ethernet cable, reboot RPi or run the following command to re-config RPi’s networking:
sudo /etc/init.d/networking restartThe above command will let RPi reset network connection using the configuration of /etc/network/interfaces. By default, RPi will search Ethernet connection first, if there is Ethernet connection, then use it, otherwise try WiFi connection. So, if the Ethernet cable was connected, then we can access RPi via Ethernet cable, if there is no Ethernet cable connected, then RPi will search for WiFi connection, and if there is WiFi connection, we can access RPi through WiFi. Note, this will also take some while.
###4. Access RPi via Ethernet cable and WiFi
On some environment, we want to control RPi remotely. Of course we can use Router Port Forward to access RPi from any where in the world. But it’s also necessary to control RPi remotely in field, where there is no internet connection! For example, a underwater robot. In water, all popular wireless signals (WiFi, Bluetooth, Radio, etc.) can be blocked in a short distance. My solution is connect RPi with Ethernet cable. Ethernet cable’s bandwidth make it possible to transfer large mount of data, like videos. On the other side of the Ethernet cable, we can connect with a computer, just like the methods mentioned above, but it’s still not convenient: I don’t want to carry my laptop on, it’s heavy!. The solution is using a WiFi router with RJ45 port (the last devices listed at the beginning).
With the WiFi router connected with RPi through Ethernet cable, start WiFi router. The red led indicator will light, and after several seconds, it blinks and changes to blue blinks every two seconds, then use your smart phone to search the available WiFi router, and choose the one connected with the Ethernet cable. Note, the WiFi router’s name and password generally come with the device, look for them at device’s bottom or from the manual.
After accessing to the aimed WiFi, start or reboot RPi. Because there is Ethernet cable connected, RPi can be accessed through Ethernet card’s IP address (192.168.10.100, set as static). Note, this will take some time!

Now, if we want to connect RPi through WiFi (with WiFi router connected to RPi via Ethernet cable), we should run the following command first:
sudo /etc/init.d/networking restartThen log onto the WiFi router (which USB WiFi adapter logged on). After a while, we can access RPi throught USB WiFi adapter.